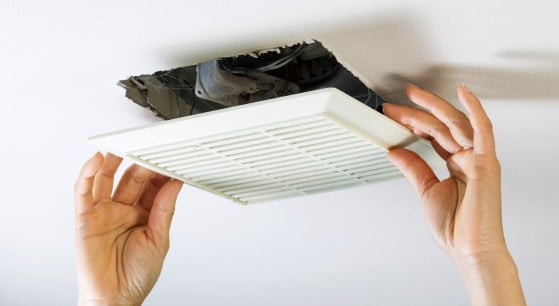
While you’re probably used to cleaning your bathroom on a regular basis, there may be one important area that you’ve been neglecting: your exhaust fan. This little fan tends to accumulate dust and dirt as it draws in the air and moisture from your bathroom, which can eventually affect its performance.
Keeping your exhaust fan in good working condition is important, as it can help eliminate odors and reduce the amount of moisture in the air that can otherwise lead to mold and mildew growth in your bathroom. Fortunately, it’s not terribly hard to clean, and you’ll only have to do it about every six months.
Here’s how to clean a bathroom exhaust fan.
Step 1: Turn Off the Fan and/or Power
You don’t want this thing starting up while you’re cleaning, so make sure it’s turned off. There is usually something that you can unplug just behind the exhaust fan cover, but if you really want to be safe then it is best to turn off the power at the circuit breaker.
Step 2: Remove the Vent Cover
Pull down on the sides of the vent cover until there is a few inches of space. Then, locate the metal spring clips or prongs on two of the sides, squeeze them together, and remove them from their slots.
Most models use this clip or prong system, but some are just screwed into the ceiling. If that’s the case, simply remove the screws using a screwdriver to loosen the vent cover.
Step 3: Wash the Vent Cover
Wash it with dish soap, warm water, and a sponge in the sink. If your bathroom sink is too small, try bringing it to the bathtub or a utility sink. After you’re done, allow it to air dry on a towel.
Step 4: Clean the Exhaust Fan
If you’re certain that the power is off, then it’s time to clean the fan itself. Use your vacuum brush attachment to clean around the fan housing and motor components, and then the crevice attachment for any hard-to-reach areas.
Once you’ve gotten rid of all the dry dust, you may still notice some caked-on grime, especially if you haven’t cleaned your fan in a long time. If that’s the case, then you can wipe it off with a damp microfibre cloth.
For a really deep clean, though, you may want to remove the fan entirely. Look for any visible screws around the fan assembly, remove them, and then carefully take the motor out of the fan housing. Using your damp microfibre cloth, carefully clean the blades and motor parts.
Step 5: Reinstall the Fan and Vent Cover
After you have made sure that you’ve cleaned and dried everything thoroughly, you can reinstall the exhaust fan and cover. If you ended up removing the motor, then begin by screwing it back into place. Then, reconnect the power by either plugging it back into the outlet or turning it back on at the circuit breaker.
Now you just need to reinstall the cover by either screwing it back in or slipping the clips back into their slots. Push the cover back into place, and you’re done!


